EasyApache (EA) is an excellent in-built tool provided in WHM/cPanel that you can use to configure your Apache web server. You can access it either via SSH or WHM.
EA4 has a few default configurations, but you can make changes to it. The configurations are known as Profiles. As you make changes to the original configuration by installing or updating modules, you must save them. This way, you can create as many configurations are you want. In this article, we explain how to save a Custom EasyApache 4 Profile.
Create a Profile
If you haven’t already, you need to create a new profile. So go ahead and install the preferred Apache and/or PHP modules. Now you can convert this newly-created packages into a profile. For this, you’d need to use the WHM interface. Follow the steps for this purpose:
After you’ve created and converted a profile, you need to save it. Here are the steps involved in saving a profile:
If you have an existing profile sitting in your computer as .json file, then you can upload it directly to the Apache web server. You can upload directly from the WHM interface. Here are the steps involved in this procedure:
Similarly, you can create and save multiple EA 4 profiles.
EA4 has a few default configurations, but you can make changes to it. The configurations are known as Profiles. As you make changes to the original configuration by installing or updating modules, you must save them. This way, you can create as many configurations are you want. In this article, we explain how to save a Custom EasyApache 4 Profile.
Create a Profile
If you haven’t already, you need to create a new profile. So go ahead and install the preferred Apache and/or PHP modules. Now you can convert this newly-created packages into a profile. For this, you’d need to use the WHM interface. Follow the steps for this purpose:
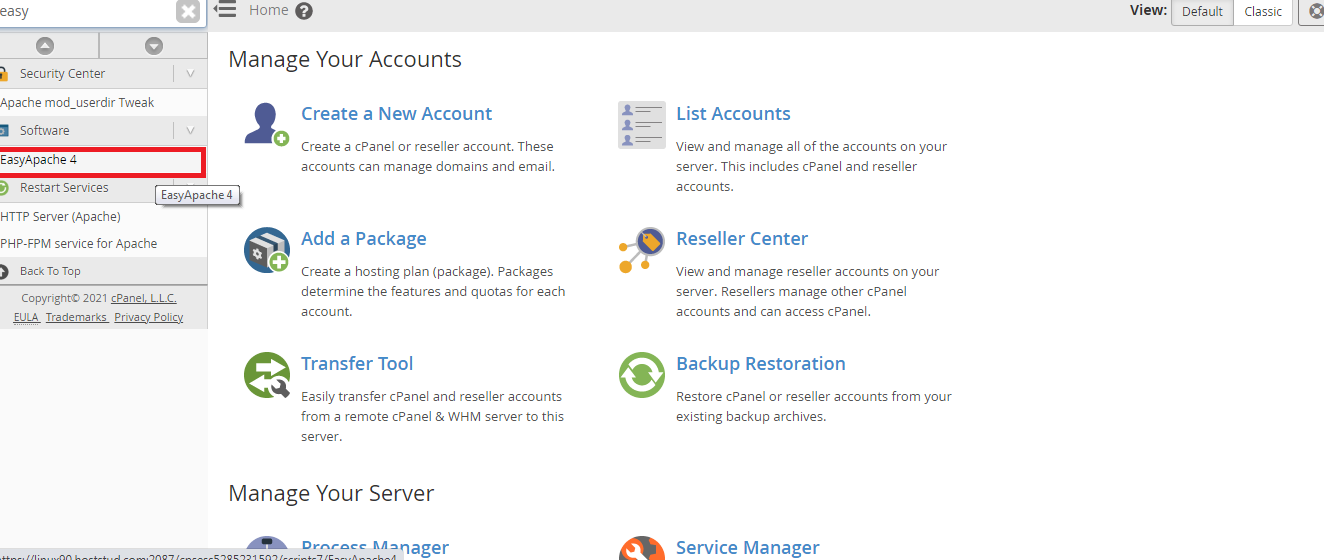
- Log in to WHM with root privileges
- Search for “EasyApache 4” in the search box
- From the Software category results, click on EasyApache 4
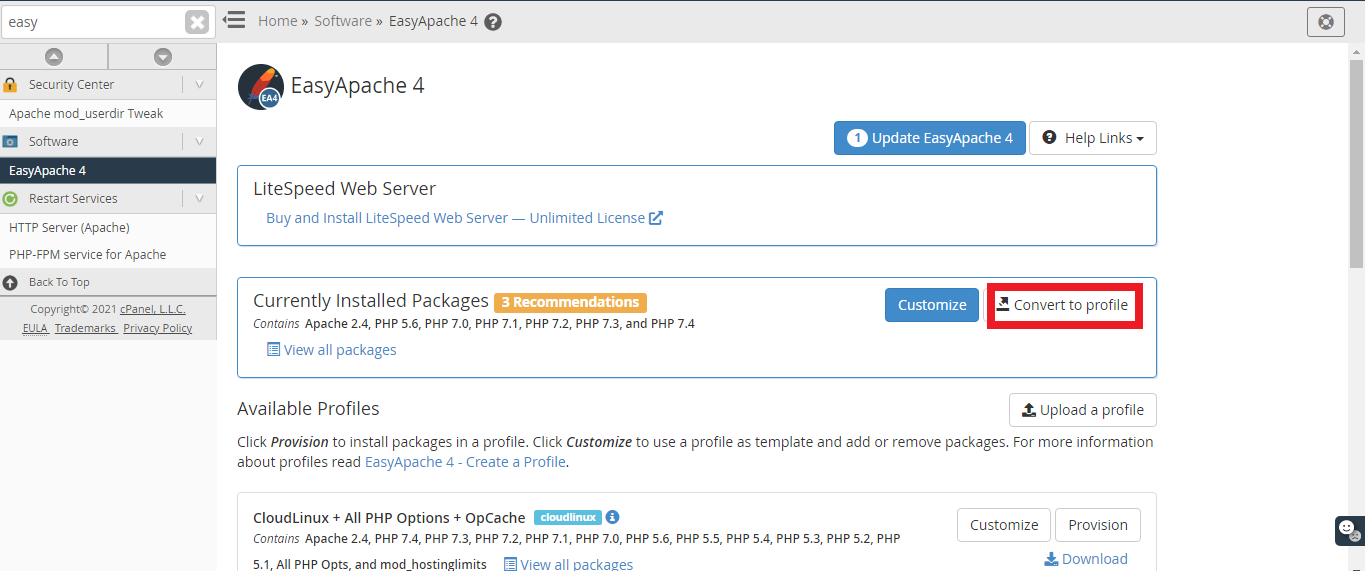
- In the “Currently Installed Packages” section, tap on the “Convert to Profile” button
- Fill out the name, filename, description, and tags information and click on the “Convert” button
After you’ve created and converted a profile, you need to save it. Here are the steps involved in saving a profile:
- Log in to WHM with root privileges
- Search and locate the “EasyApache 4” tool
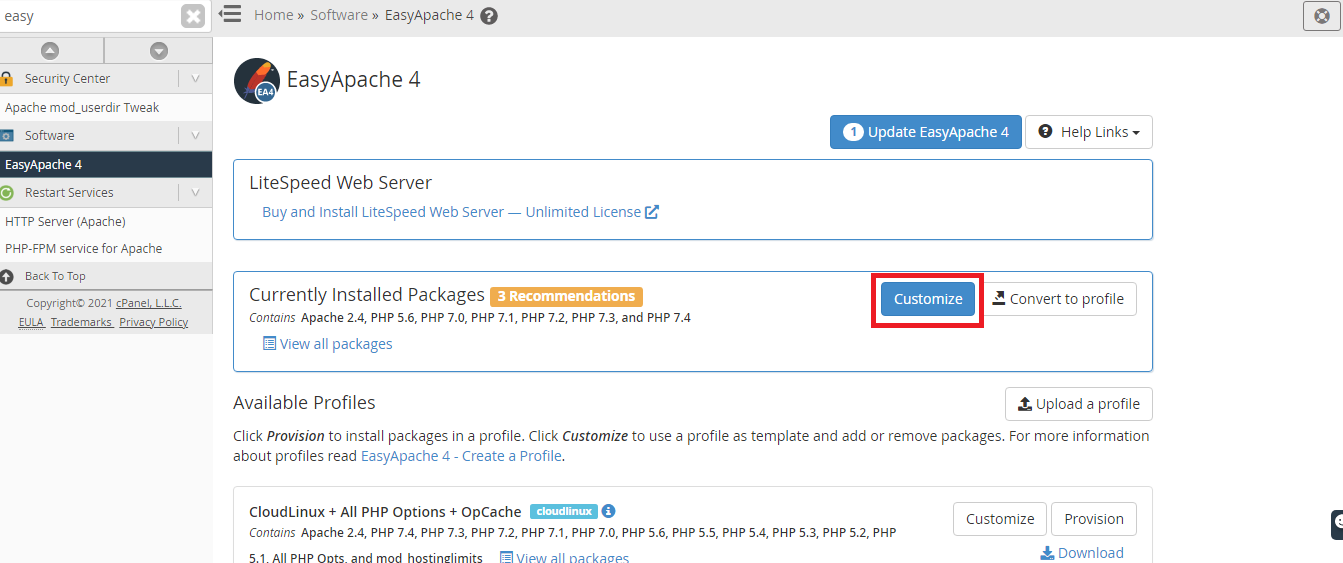
- Find the “Currently Installed Packages” section and select the “Customized” button
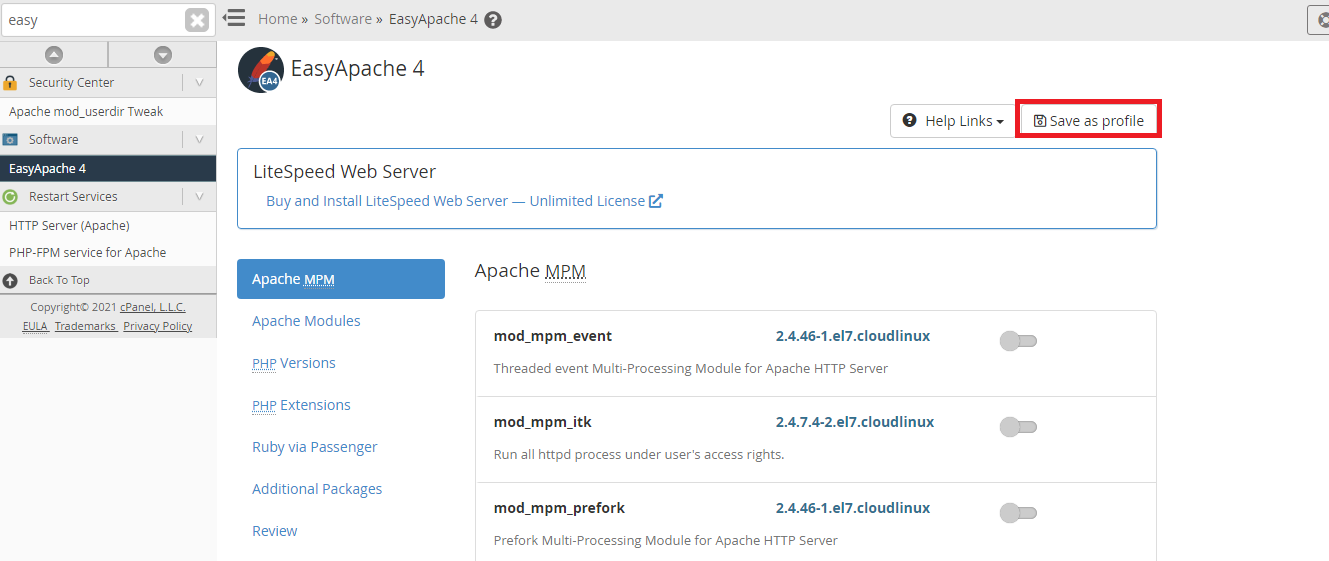
- You’ll find a list of options like Apache MPM, PHP Versions, Ruby via Passenger among others. Make necessary changes
- Click on Review to see the changes you’ve made
- From the upper right corner, find and click on the “Save as profile” button
- Provide the necessary details like Name and filename and optional details like description and tags
- Click on the “Save” button to confirm
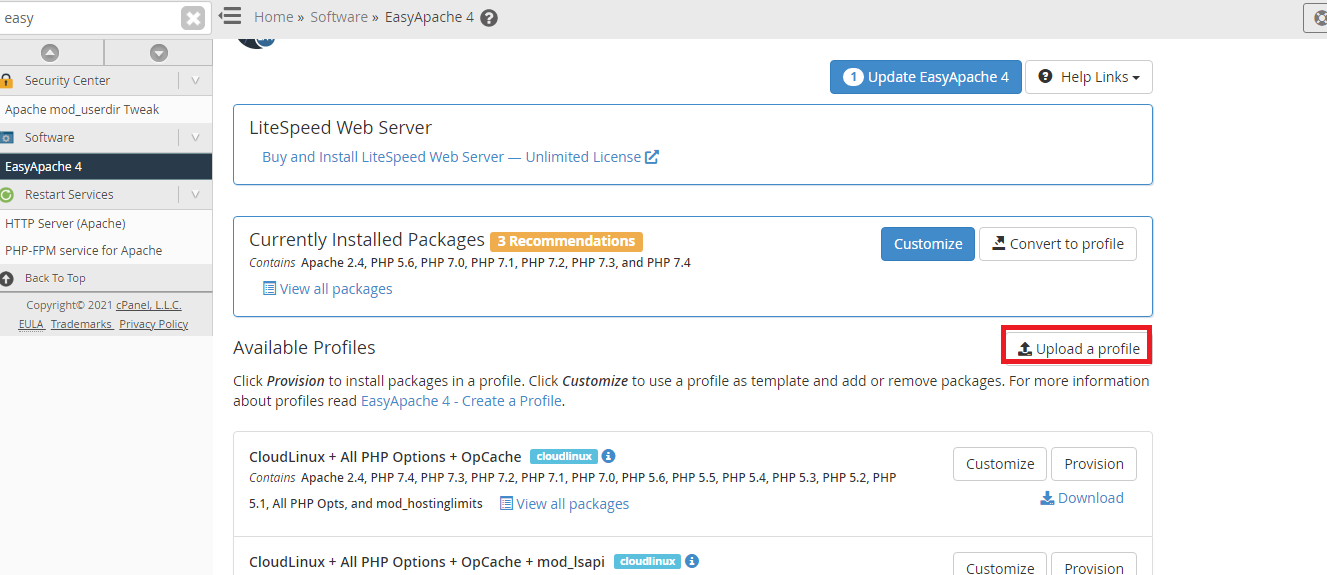
If you have an existing profile sitting in your computer as .json file, then you can upload it directly to the Apache web server. You can upload directly from the WHM interface. Here are the steps involved in this procedure:
- Log in to your WHM dashboard with root privileges
- Search and locate the EasyApache 4 tool. Click on it to open
- Under the “Available Profiles” section, you’ll find a button that reads “Upload a profile”. Click on it
- Next, click on the “Browse” button to find the .json file on your computer. Alternatively, you can click on the “Retrieve from URL” button if you want to upload from an online source instead
- To confirm, tap on the “Upload” button
Similarly, you can create and save multiple EA 4 profiles.