Connecting your dedicated server using SSH might be a difficult task for you! It requires minimal work of command-line interface execution. The first step is to add your IP address to the firewall and so, you can connect dedicated server easily.
How to add IP to the firewall?
Step 1: Take a note of your IP address separately. Go to WHM and then log in using credentials.
Step 2: Go to the search box and start typing as “Firewall”.
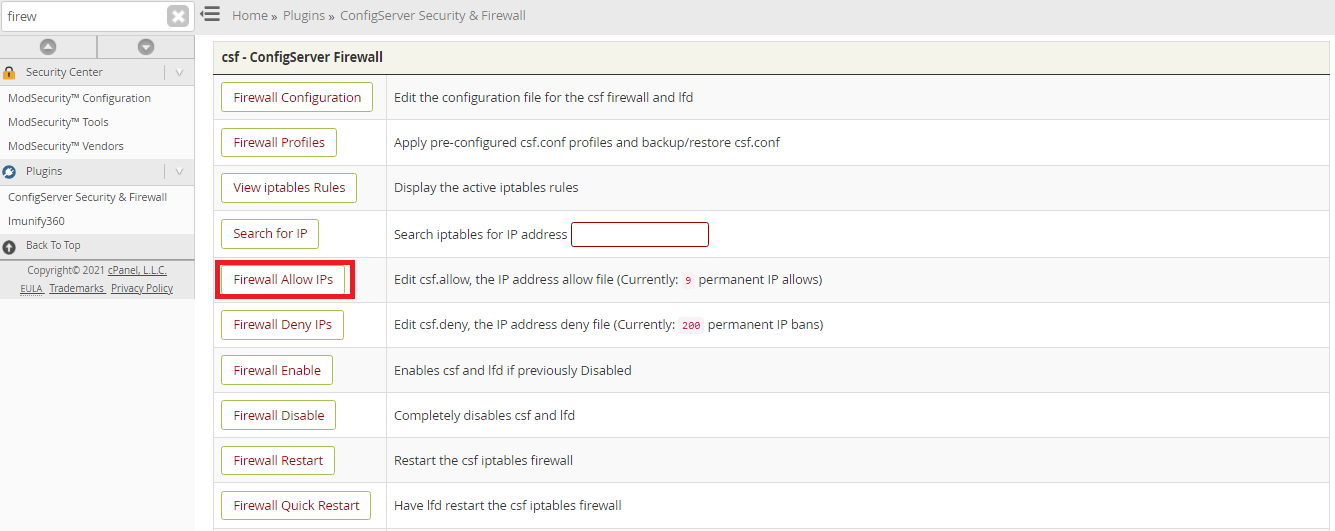
Step 3: Start entering your IP address into the field of allow rule.
Step 4: Don’t forget to tap on the button “Change”.
How to use Terminal or PuTTY for connection?
You have added an IP address to your field. Start connecting to the server by using a terminal like Mac or Linux and PuTTY.
Use PuTTY for dedicated server connection:
Step 1: Do PuTTY download and install it in your system. Either you can enter the IP address or hostname to get a dedicated server.
Step 2: Tap on the button “Open”. It shows an alert message with three option accept, connect once and cancel.
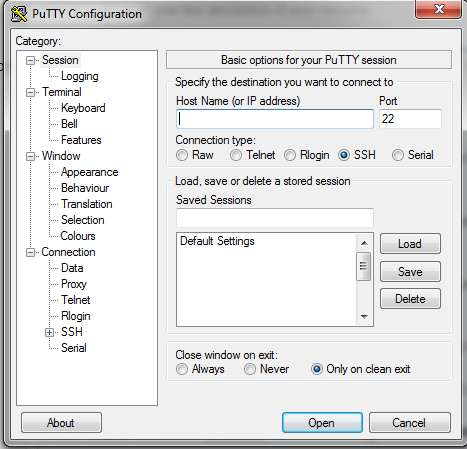
Step 3: Click on the button “Accept”. By now, you will receive a login message so, you need to enter your username here. Don’t forget to click “Enter”.
Again enter your password! You can’t see your password while typing. So, don’t get hesitated.
That’s it! You have done using PuTTY for connecting dedicated server.
How to use Windows OpenSSH for connecting dedicated server?
You can see the combination of Powershell accessed in Windows 10 with a native of OpenSSH.
Step 1: Tap on the menu “Start” and start typing as “Powershell”.
Step 2: You are about to run as an administrator and so, follow the instructions of Unix.
How to use Terminal for connecting dedicated server?
Step 1: Do open the terminal and give a space type as ssh. Again use @ symbol and add your username. Enter your domain name without fail.
Step 2: “Are you sure you want to continue connecting” – If you get a message by stating this then tap on yes and then press the “Enter” button.
Step 3: It will ask you to enter a password; You can’t see password typing.
It’s just a few steps to get connected with your dedicated server. Choices are your choices! Prefer the one which is easy for you in present as well as in future.
How to add IP to the firewall?
Step 1: Take a note of your IP address separately. Go to WHM and then log in using credentials.
Step 2: Go to the search box and start typing as “Firewall”.
Step 3: Start entering your IP address into the field of allow rule.
Step 4: Don’t forget to tap on the button “Change”.
How to use Terminal or PuTTY for connection?
You have added an IP address to your field. Start connecting to the server by using a terminal like Mac or Linux and PuTTY.
Use PuTTY for dedicated server connection:
Step 1: Do PuTTY download and install it in your system. Either you can enter the IP address or hostname to get a dedicated server.
Step 2: Tap on the button “Open”. It shows an alert message with three option accept, connect once and cancel.
Step 3: Click on the button “Accept”. By now, you will receive a login message so, you need to enter your username here. Don’t forget to click “Enter”.
Again enter your password! You can’t see your password while typing. So, don’t get hesitated.
That’s it! You have done using PuTTY for connecting dedicated server.
How to use Windows OpenSSH for connecting dedicated server?
You can see the combination of Powershell accessed in Windows 10 with a native of OpenSSH.
Step 1: Tap on the menu “Start” and start typing as “Powershell”.
Step 2: You are about to run as an administrator and so, follow the instructions of Unix.
How to use Terminal for connecting dedicated server?
Step 1: Do open the terminal and give a space type as ssh. Again use @ symbol and add your username. Enter your domain name without fail.
Step 2: “Are you sure you want to continue connecting” – If you get a message by stating this then tap on yes and then press the “Enter” button.
Step 3: It will ask you to enter a password; You can’t see password typing.
It’s just a few steps to get connected with your dedicated server. Choices are your choices! Prefer the one which is easy for you in present as well as in future.