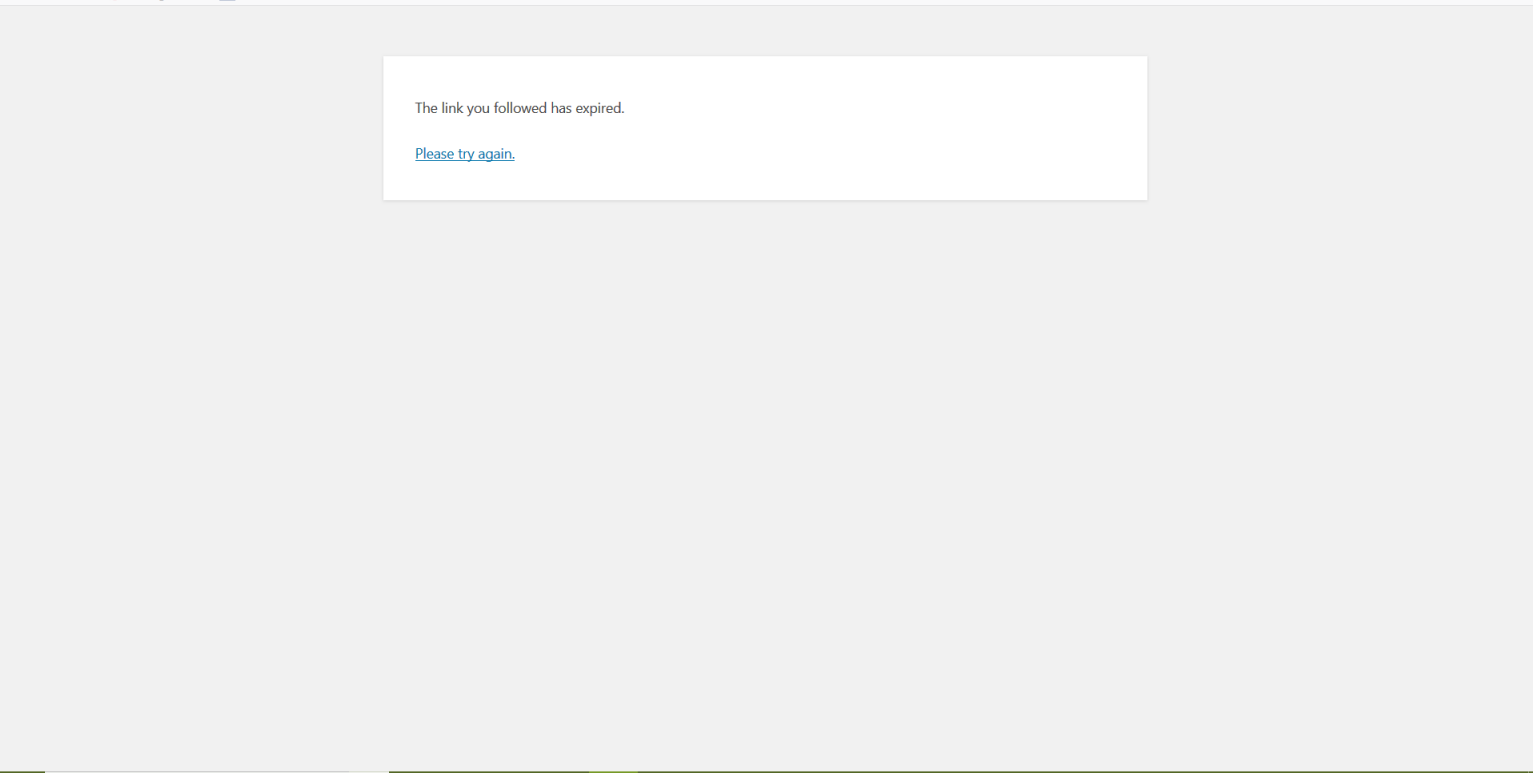
WordPress, even though a open source platform, is notorious for showing various types of errors every now and then. One of them is related to the links present on your website. At times, you may get the message “The Link You Followed Has Expired” after you’ve clicked on a link and tried to open a web page. So the web page you’re opening is no longer available. This can be a real problem if that page is of high importance.
If you’re a WordPress beginner, then it’s easy to get perplexed as to what is going on. Usually, this message pops up when you make some changes to your website. But there’s nothing to panic. You can fix this error in a couple of steps.
Why You Get this Error?
Before diagnosing the problem, it’s always better to get knowledgeable about the error. The main reason for this error is that the server runs out of memory and to cope up with the shortage, it single outs some memory-heavy parts of the website, which most probably includes the web page displaying the error.
You will see the link expiry error when you either upload a new theme, a large file, or a large directory other than the theme. In these scenarios, you might also experience the “Maximum Execution Time Exceeded” error. Hosting companies set a maximum upload limit to keep your website safe and memory efficient.
In both the cases, the reason for getting is error is same and so is the solution.
How to Fix “The Link You Followed Has Expired” Error
By now you’d have guessed it correctly that to fix the error, all you have to do is increase the memory allocation. And yes, that’s how we’ll be fixing the link expiry error. But before that, it’s advised to clear the cache once and try reloading the web page. At times, the browser cache manager kind of messes with the web pages. Also, check for the error in incognito mode. If the problem persists, try the following methods:
Edit your .htaccess
.htaccess is among the core files WordPress utilizes to run your website. To increase the memory limits, you can edit this file. Here are the steps involved:
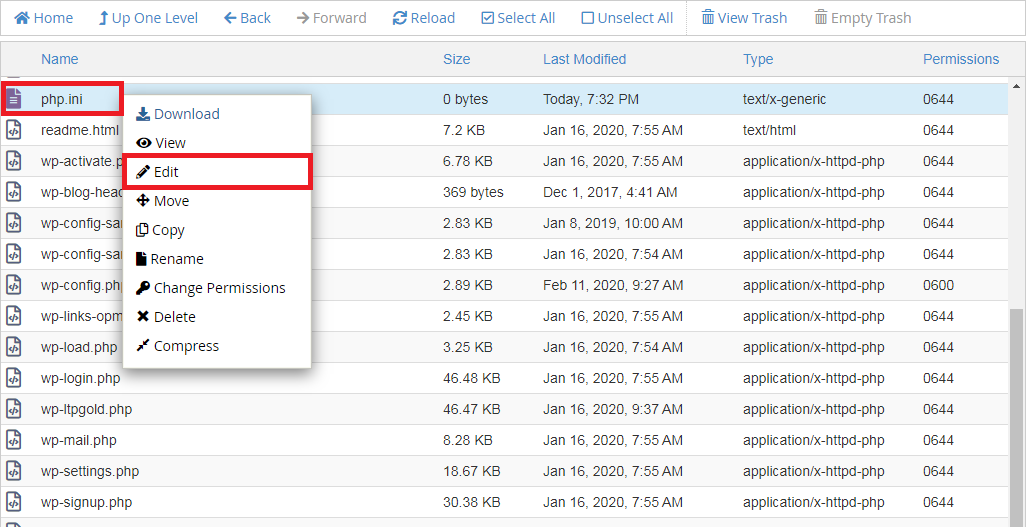
Alternatively, you can edit your php.ini file. If you don’t find it find it in your public.html folder, then you might have to create one. Here are the steps you need to take to create your php.ini file:
If you’ve been a WordPress admin for quite some time now, then you must have worked on functions.php at least once. So you might find it easy to work with. But one of the disadvantages is that after you have edited it, the old limits will get applied every time you change the theme. So you have to come in here and make necessary changes. So you have to weigh in your options.
Here are the steps involved:
Notice in each method, we’re simply increasing the maximum size allowed for media uploads. This should fix the error and you should no longer see the link expiry error. If problem persists, we recommend getting in touch with your hosting provider for assistance.
If you’re a WordPress beginner, then it’s easy to get perplexed as to what is going on. Usually, this message pops up when you make some changes to your website. But there’s nothing to panic. You can fix this error in a couple of steps.
Why You Get this Error?
Before diagnosing the problem, it’s always better to get knowledgeable about the error. The main reason for this error is that the server runs out of memory and to cope up with the shortage, it single outs some memory-heavy parts of the website, which most probably includes the web page displaying the error.
You will see the link expiry error when you either upload a new theme, a large file, or a large directory other than the theme. In these scenarios, you might also experience the “Maximum Execution Time Exceeded” error. Hosting companies set a maximum upload limit to keep your website safe and memory efficient.
In both the cases, the reason for getting is error is same and so is the solution.
How to Fix “The Link You Followed Has Expired” Error
By now you’d have guessed it correctly that to fix the error, all you have to do is increase the memory allocation. And yes, that’s how we’ll be fixing the link expiry error. But before that, it’s advised to clear the cache once and try reloading the web page. At times, the browser cache manager kind of messes with the web pages. Also, check for the error in incognito mode. If the problem persists, try the following methods:
Edit your .htaccess
.htaccess is among the core files WordPress utilizes to run your website. To increase the memory limits, you can edit this file. Here are the steps involved:
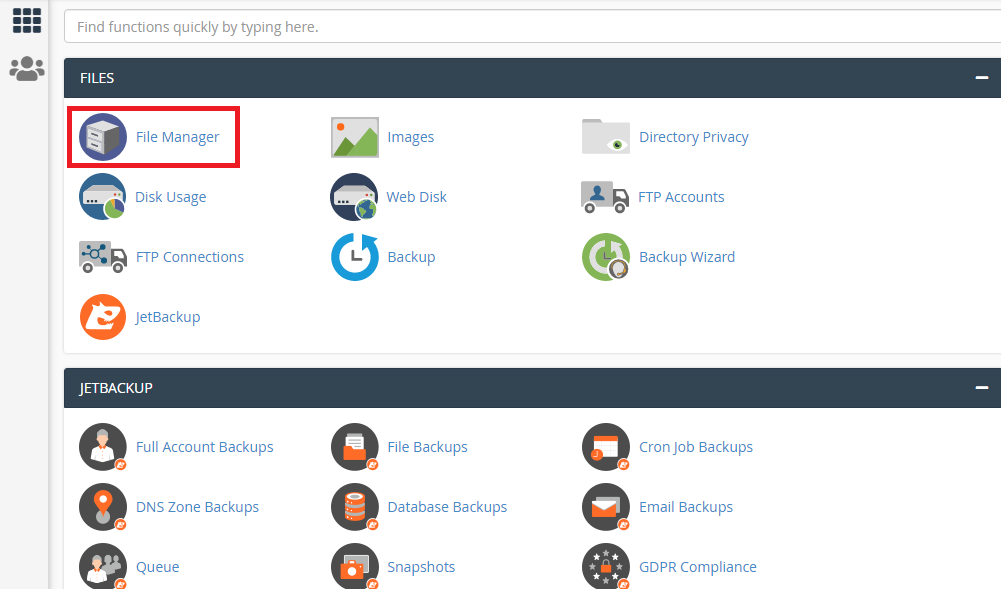
- Log into your cPanel
- Navigate to your File Manager
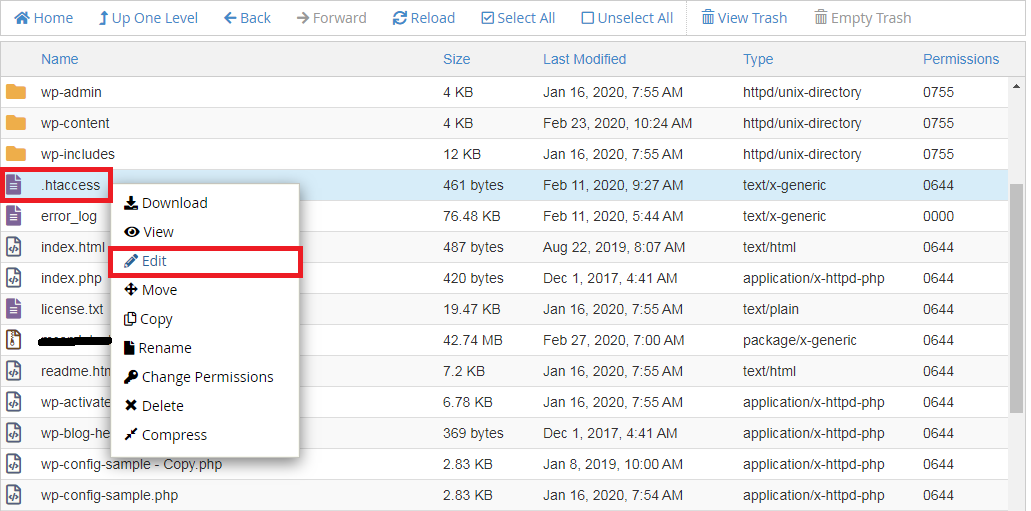
- Open .htaccess file by clicking on “Edit”
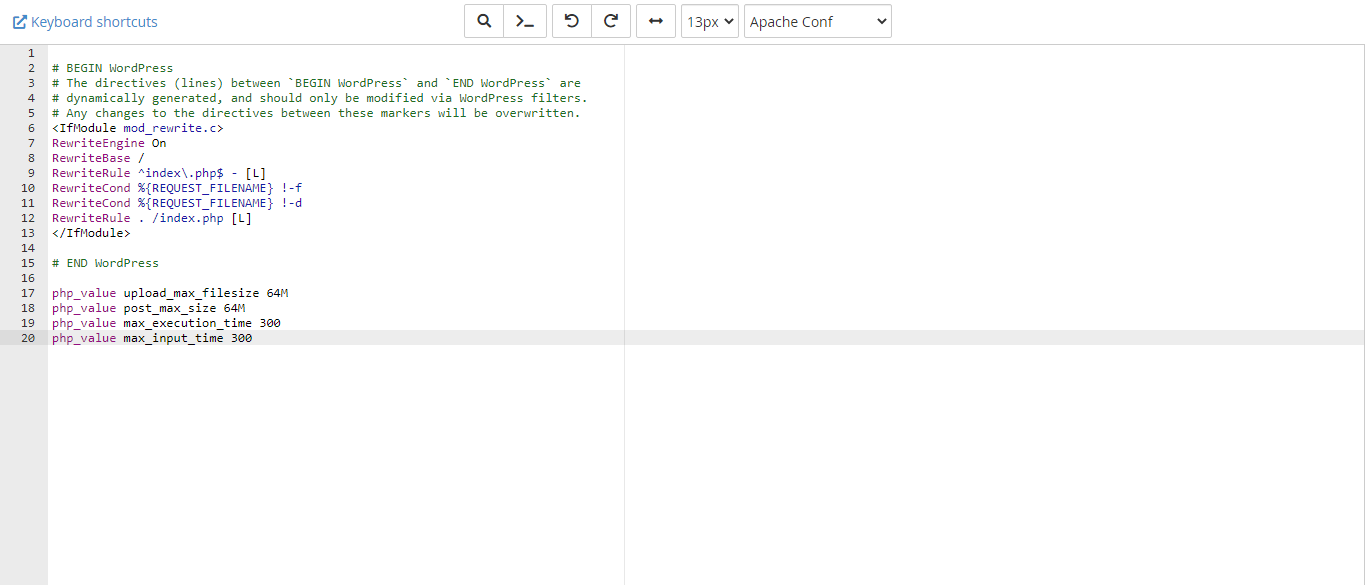
- Copy the next code into it:
Code:
php_value upload_max_filesize 64M
php_value post_max_size 64M
php_value max_execution_time 300
php_value max_input_time 300- Save the file and exit.
Alternatively, you can edit your php.ini file. If you don’t find it find it in your public.html folder, then you might have to create one. Here are the steps you need to take to create your php.ini file:
- Navigate into your public.html folder
- Create a empty .txt file and name it php.ini
- Copy the below code into it:
Code:
upload_max_filesize = 64M
post_max_size = 64M
max_execution_time = 300- Save and exit.
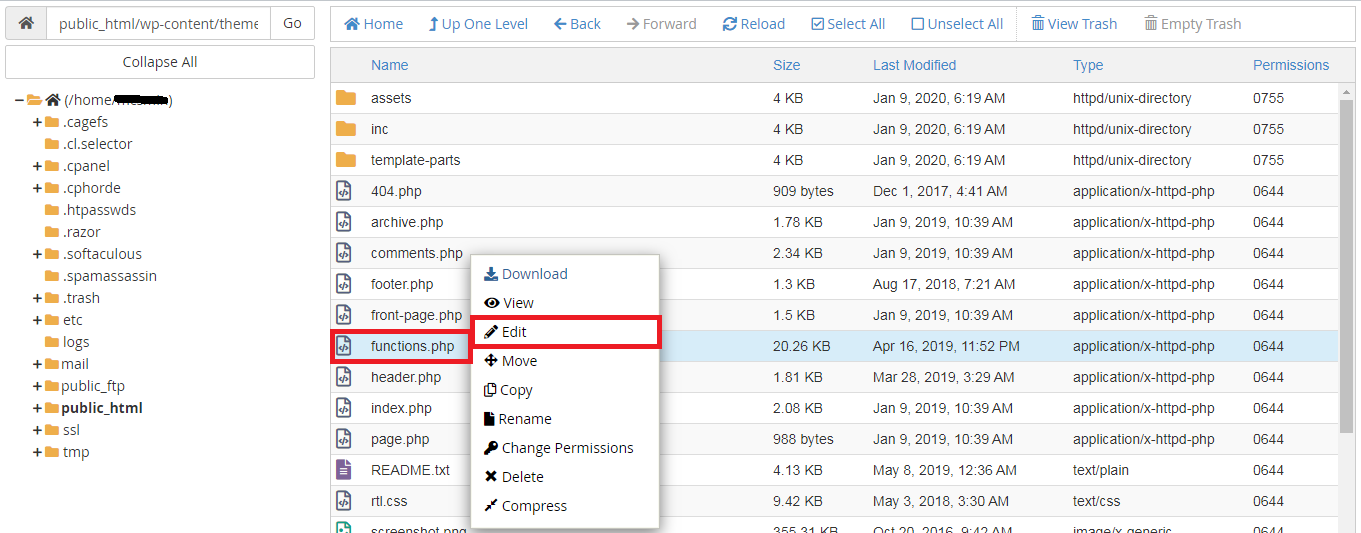
If you’ve been a WordPress admin for quite some time now, then you must have worked on functions.php at least once. So you might find it easy to work with. But one of the disadvantages is that after you have edited it, the old limits will get applied every time you change the theme. So you have to come in here and make necessary changes. So you have to weigh in your options.
Here are the steps involved:
- Go to the current theme and find the functions.php file in wp-content/theme/themename/ location.
- Open it and paste the code below:
Code:
@ini_set( 'upload_max_size', '100M');
@ini_set( 'post_max_size', '100M');
@ini_set( 'max_execution_time', '300');
Notice in each method, we’re simply increasing the maximum size allowed for media uploads. This should fix the error and you should no longer see the link expiry error. If problem persists, we recommend getting in touch with your hosting provider for assistance.